

Malabar spinach is a wonderful plant to add to your vegetable garden. It is rich in nutrients and has a good amount of protein and antioxidants to help keep your cells from aging.
This simple guide is guaranteed to help you grow and have your own steady supply of Malabar spinach.
RELATED: 10 Easy Vegetable Gardening Tips To Achieve An Abundant Harvest
Grow Malabar Spinach the Right Way
Things You’ll Need:
- Malabar seeds
- paper towels
- potting mix
- seed tray
- fertilizer (liquid or organic)
Step 1: Germinate the Seeds
View this post on Instagram
If you are using seeds from freshly picked berries of the Malabar spinach, make sure to wash them first and remove the pulp. It is best to soak them in water for 6 to 12 hours.
On the other hand, if you’re using store-bought seeds, you can start germinating right away. Wrap the seeds in a damp paper towel and place it in a ziplock bag at a temperature between 75 to 85° F.
Change the paper towel with a new one every 2 days to keep a clean environment for the seeds. After 4 to 6 days, you should be seeing small shoots starting to pop up.
Step 2: Transfer the Seeds
View this post on Instagram
Once you see small shoots coming out of the seed shell, you can now sow them in a seed tray.
Get a seed starting tray and add potting mix in each cell. A potting mix with 50% normal garden soil, 25% cocopeat, and 25% organic compost will work well for Malabar spinach.
To transfer the seeds, make small holes in the potting mix. Add 1 to 2 seeds for each cell.
Gently cover the holes with a thin layer of potting mix, making sure everything is evenly covered. Spray it with water thoroughly.
In 3 to 4 days, Malabar spinach will start to emerge and produce leaves. You can supplement them with liquid fertilizer to help the seedlings grow better.
Step 3: Prepare for Planting
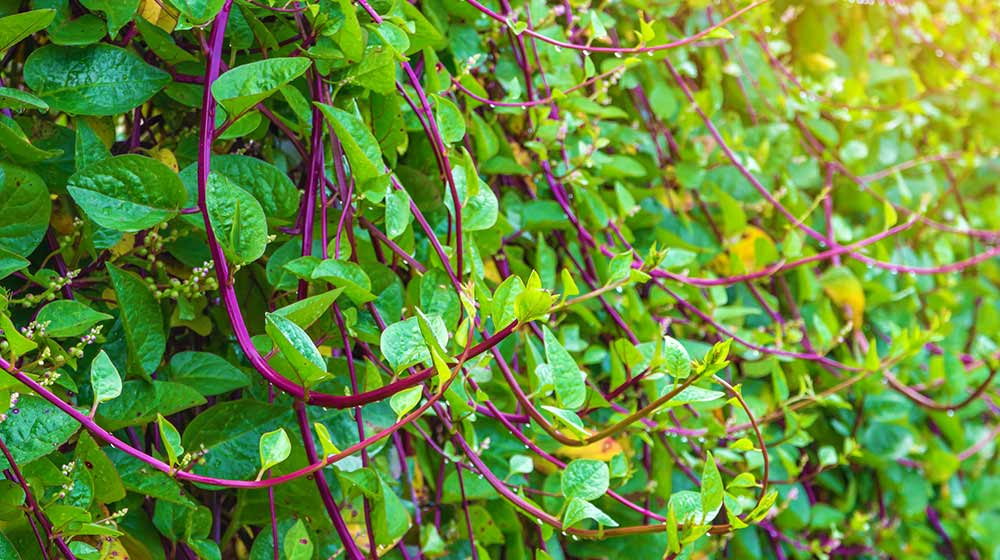
You can grow Malabar spinach in an in-ground garden, a raised bed, or a container as long as you provide a sturdy trellis at least 8 ft. high.
This plant tends to grow tall and be invasive; that’s why you need to put strong support. Choose a location where it gets full exposure to the sun, with partial shade, and easy access to water.
Malabar spinach likes moist and well-draining soil with an adequate amount of organic matter. You can use the potting mix you use for seed germination.
RELATED: 15 Best Summer Vegetables And Fruits You Should Start Planting Now
Step 4: Transplant the Seedlings
View this post on Instagram
Transplant the Malabar spinach seedlings in late spring right after the soil temperature has warmed – the warmer the weather and the soil, the higher chance of optimal growth.
Make holes in your garden bed or container, then plant each seedling about 2 ft. apart. Malabar spinach can cover up a big space on a trellis, so 2 to 3 plants in one area is more than enough.
Lastly, water your Malabar spinach plant thoroughly and keep the soil moist but well-draining. After 20 days, you’ll notice that the plants grew a lot bigger. They will also start to get dense and vine up the trellis.
Thinking of the best time to harvest Malabar spinach? It is as early as the main stems and leaves are still growing well and tender.
Watch this video by Suburban Homestead on how to grow Malabar spinach from seeds or cuttings:
Malabar spinach is absolutely a must-have in your vegetable garden. It’s not only a stunning tropical vining plant, but also an excellent source of plant-based protein – perfect for any vegan and vegetarian homecooked recipes. It is also a good source of potassium, phosphorus, and magnesium.
Besides, growing this nutritious plant has become easier with the step-by-step guide above. May you grow luscious Malabar spinach in your yard. Happy planting!
Have you tried growing a Malabar spinach plant before? Let us know in the comments section below.
Up Next:
- How To Grow Kale In Containers The Right Way
- 19 Stunning Climbing Plants Perfect For Trellis And Arbors
- 10 Best Garden Theme Ideas To Freshen Up Your Garden
Calling all green thumbs, Garden Season needs YOU! Click here if you want to contribute for us!
Want to stay up to date? Follow Garden Season on Facebook, Twitter, Instagram, and Pinterest.
