

Grow kale in containers like a pro, so you’ll have a steady supply of this highly nutritious green leafy vegetable all year round.
While in-ground and raised bed gardens are great for growing kale, container gardening is also an excellent growing option. This step-by-step guide covers everything you need to know about growing kale in containers. Now, let’s get planting!
RELATED: Container Gardening Tips For The Winter Season
Grow Kale in Containers | Beginners Guide
Why You Should Grow Kale at Home
@myhealthydishHow to cook Crispy Ranch Kale Chips ##kale ##airfyer ##letscook ##tiktokpartner ##learnontiktok♬ original sound – myhealthydish
Kale contains high levels of minerals, brain-boosting phytonutrients, and vitamins. Kale plant is from the cabbage family and is rich in vitamin A, K, and C.
It is also a fiber-rich leafy green which is great for any fun and healthy recipes. Add kale to salads, soups, pasta, smoothies, chips, and more! It makes sense why kale is often called the “queen of greens!”
The methods of growing kale are straightforward and quite similar to growing other hardy vegetables like Swiss chard and Brussels sprouts. It is versatile and can be grown in open ground, raised beds, and containers.
When to Plant Kale
[instagram url=https://www.instagram.com/p/B_TMKMlH06h/ hidecaption=true width=800]
Cold temperature brings out the sweet and nutty taste of kale that’s why it is ideal to plant this superfood in early spring or fall.
In early spring, you can start planting kale in containers 3 to 5 weeks before the last frost. On the other hand, kale can be seeded 6 to 8 weeks before the first frost in the fall.
Kale Fact: Kale is frost resistant and can handle freezing temperatures really well. The colder it gets, the sweeter the kale leaves become.
How to Grow Kale in Containers
Step 1: Start Seed Indoors
[instagram url=https://www.instagram.com/p/BRvY0A3hkeO/ hidecaption=true width=800]
Although you can directly grow kale from seed in a container, I recommend starting your seeds indoors.
If jiffy peat pots are not available, you can always make DIY starter pots and use biodegradable materials like paper towel rolls and eggshells.
Add a good soil mix or any growing medium first in your preferred starter pot, then add 3 seeds each. The next step is to put your starter pots on a tray and wait for 5 to 7 days until the seeds germinate.
For indoor seedlings, grow lights are ideal but not necessary. If grow lights are not available in your household, just place the growing trays on a bright windowsill and it will be as perfect.
Seeds directly planted in containers will mature in 55 to 75 days, while transplants will be ready in 30 to 40 days.
Step 2: Choose the Right Container
[instagram url=https://www.instagram.com/p/BRoxMvclPc8/ hidecaption=true width=800]
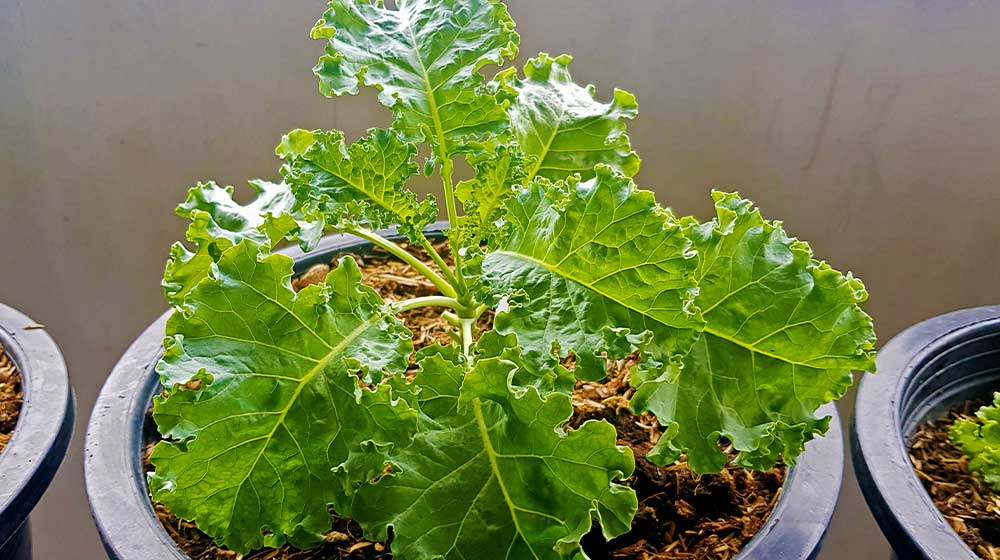
Kale grows excellently in well-draining containers like pots and planter bowls that are not less than 12 to 14-inch for one plant. Kale roots need enough room to grow underneath.
You can also use a 5 to 10-gallon container or an old toolbox tote. Reusing trash items or old stuff are always the right thing to do!
Step 3: Transplant the Seedlings
[instagram url=https://www.instagram.com/p/Bja_-QSFeUQ/ hidecaption=true width=800]
For the kale plant, you’ll need loose soil enriched with organic compost. Get your plant container and add the soil gradually. Sprinkle water on every layer to make sure the soil is moistened underneath.
Dig a hole in the center and gently put a seedling in it. If you used jiffy peat pots, paper towel rolls, or eggshells, you can just put the entire thing altogether. This will reduce shock to the roots while transplanting.
Paper pots will decompose naturally, while eggshells will provide calcium to the plants.
Kale plants tend to grow pretty big and bushy, so you’ll want to grow only one kale plant per container.
Give your kale plant the right amount of water, and now it’s ready to get hardened outside.
RELATED: 8 Spring Vegetables To Plant In Your Garden
Step 4: Expose Kale Plant Outside
[instagram url=https://www.instagram.com/p/BorUi30nShm/ hidecaption=true width=800]
Place your kale plants outside in a spot where they can get full sun 6 hours a day. However, they also don’t like extremely hot conditions since they are known as cold-weather crops.
They usually thrive at 18°C and can tolerate up to 26°C. To make sure your kale plant won’t bolt, give it an afternoon shade if the weather gets hotter.
Step 5: Care for Kale Plant
[instagram url=https://www.instagram.com/p/CATlUNZAuAU/ hidecaption=true width=800]
Keep kale plants well-watered and fed every day to maximize their full potential. Aside from these, mulching the soil around the plants will keep the soil cool and moist.
Moist soil, along with cool temperature, helps to keep the kale leaves sweet and crisp. You can use your finger to check the soil moisture. Water the soil when a couple of inches down are dry to the touch.
Another way to keep a healthy kale plant is by adding organic fertilizer throughout the growing process.
Before you know it, you’re going to enjoy delicious and healthy kale in a few weeks.
Step 6: Control the Pests
@jtothelevRelease the ladybugs ##gardening ##greenhouse ##cottagecore ##california ##tomjones ##aphids♬ She’s a Lady – Tom Jones
Aphids are the most common pests that affect kale plants. If left unchecked, these pests can multiply really fast and eventually kill the entire plant.
To get rid of aphids naturally, you can simply use a water spray or employ ladybugs to your kale garden. Ladybugs are natural predators of aphids.
An organic spray will also help control these destructive pests. Just add 1 tablespoon of neem oil and 1 tablespoon of pure castile soap to 2 gallons of water. Transfer the mixture in your pump sprayer, then spray directly to the kale plants.
Step 7: Harvest the Leafy Greens
[instagram url=https://www.instagram.com/p/CCcCQBmFJIF/ hidecaption=true width=800]
After 2 months, the plants are approximately gonna be 10 to 12 inches high, and you can harvest kale leaves straightaway. The best time to harvest is always going to be early in the morning before the sun hits the plant.
To harvest kale leaves, you’ll need a pair of pruning scissors or garden cutters. Start cutting off the leaves closest to the soil surface.
Make sure not to cut the main stem, as well as the interior section of the kale plant. This is where all the baby leaves are coming out.
Tip: If your kale plant is bolting or looking a little bit shabby and you’re ready to pull it out, trust me, don’t pull your kale plant out! Prune it back to keep it growing healthier. Then, add some good organic nutrients to the soil and some dose of nitrogen-rich fertilizer to promote leafy growth.
Watch this video by Plant Abundance on how to easily eliminate aphids in your garden:
There you have it! A simple tutorial on how to grow kale in containers. If you don’t have a yard or you have limited gardening space, you can still grow kale plants really well in 5 (or bigger) gallon containers.
A few years ago, kale became popular in the healthy food scene as one of the healthiest greens in town. Thus, growing your own kale plant can be a silver bullet because you won’t have to buy this superfood every time you crave a fresh kale salad or savory kale chips.
Do you have any tips on how to grow kale in containers? Let us know in the comments section below.
Up Next:
- How To Grow Beets In Containers | Garden Season Spring Ideas
- Growing Cabbage In The Cool Season | Garden Season Guide
- The Best Pots and Soil For Succulents: Everything You Need To Know
Calling all green thumbs, Garden Season needs YOU! Click here if you want to contribute for us!
Want to stay up to date? Follow Garden Season on Facebook, Twitter, Instagram, and Pinterest.
