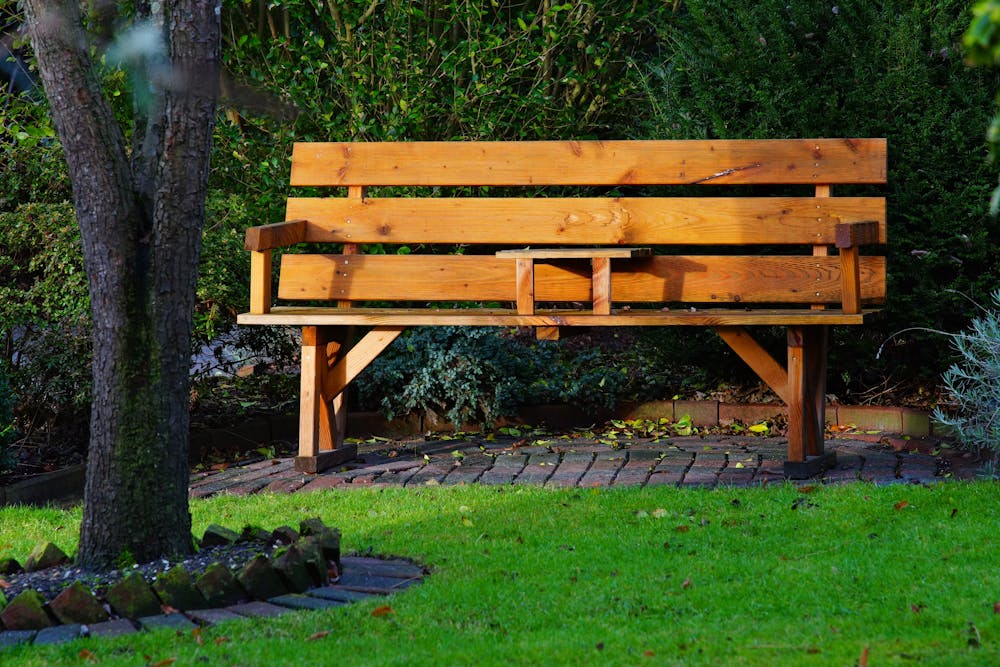
Want to do away with expensive outdoor furniture and build a DIY wooden bench? Check out this DIY garden bench made from reclaimed wood. You'll be surprised by the huge savings in your landscaping budget!
How To Build A DIY Wooden Bench For Your Garden
Although I've studied many DIY woodworking guides, somehow I always feel intimidated to use power tools or any other woodworking tools. But after building my own garden bench with a bit of a helping hand, I've realized starting it was just the hard part. Challenge yourself with this garden woodworking project and you'll definitely feel a great sense of accomplishment. Plus, you'll rest easy on your new garden bench knowing you didn't spend a fortune on it!
Reclaimed Wood For DIY Wooden Bench
A wooden garden bench can go for as much as a hundred dollars or even more, and for me, that's just too much. Did you know you could get your hands on reclaimed wood for use in your woodworking projects? Here's how you can get wood pallets for less or for free.
Materials And Tools To Build A DIY Wooden Bench:
- Wooden slabs stripped from a large pallet
- Safety Gear (work gloves, work boots, eye and hearing protection, dust mask)
- Cordless Drill
- Chop Saw
- Screws
- Hammer and Nails
- Corner Brackets
- Sandpaper and varnish (optional)
Step-By-Step Guide To Build A DIY Wooden Bench

If you have access to reclaimed woods and wood pallets, you'll be able to DIY a garden bench pretty much for free. However, make sure the wooden pallets are safe to use and you can find out how here. With all your materials ready, let's get going with this DIY garden bench!
Section One: Working On The Wooden Bench Legs
- Pick thick beams from wood pallets and dismantle it safely.
- For the legs, pick 4 long beams and measure out 24 inches, then cut using a chop saw.
- Cut another 2 pieces of wood, 20 inches long to connect and support the legs.
- Using a router, shave around the edges to give it a smooth edging.
- Mark the legs at 14 inches from the base, then place the cross section under the line.
- Drill holes through the beams for the screw but leave a one-inch gap on both ends of the cross section.
- Do this for both sides of the bench frame.
Section Two: Working On The Wooden Bench Seat
- Take another two long beams and measure out 44 inches for the front and back piece of the seat, then cut.
- Using a router, smooth the edges of the side facing up for the bench seat.
- Measure 4 more beams with the same length as the front and back piece then cut.
- Smoothen the edges of the sides facing up and space them evenly on the seat frame.
- Drill holes into both ends of the beams resting on the seat frame and screw them in place.
Section Three: Working On The Backrest Frame And Armrest
- For the backrest frame, measure 2 pieces of beams at 20 inches and smooth out the top side of each.
- Place the base of the beams for the backrest against the back leg pieces of the bench frame.
- Drill holes through both beams and bolt it into place.
- Cut a piece of wood measuring the length of the backrest beams then wedge it in. This will keep the backrest in line and help the armrests fit.
- For the armrest, cut or chop another pair of wood beams measuring 22 inches long.
- Smooth out the top side of what will be the surface of the arm rest.
- Attach the armrest to the support beams by drilling holes and bolting them into place.
Section Four: Working On The Backrest
- Cut first the shortest beam for the backrest measuring 44 inches.
- Then, with a router, smooth the edges of the side facing up or front.
- Position the piece parallel to the armrest then drill holes and bolt them into place.
- Cut another 3 beams measuring 49 inches in length and smooth out the edges facing up or front.
- Again, drill holes in these beams and screw them into place.
Section Five: Finishing Touches In The Wooden Bench
- Secure the backrest by adding two more screws.
- Do the same underneath the bench seats.
- Cut a thin strip measuring the length of the bench and nail it to the front to cover the base of the bench.
- You can also attach corner brackets underneath for added support.
- Lastly, sand the bench and apply several coats of varnish, or if you want, some bold colored paint for a trendy garden landscape.
- Viola! You can now enjoy your garden bench.
Follow the step-by-step guide to building a DIY wooden bench in this video:
Now wasn't that just so easy to follow? Sometimes, to get exactly what you want, you just have to do it yourself. Now that I've tried it, I feel like there's no end to my gardening crafts. I also made a DIY pallet garden tool rack and I think it rocks. Do this DIY wood pallet garden bench for limitless DIY woodworking possibilities in your garden!
Up for a garden woodworking challenge? Share your thoughts and ideas about this DIY wooden garden bench in the comments section below.
In our never-ending quest to keep our garden looking beautiful, you might want to check these raised bed ideas to add to your garden landscape.
Don't forget to follow us on Facebook, Instagram, Pinterest, and Twitter for more smart gardening ideas!
Feature image source via HD Walls Blog


