

If you’ve ever felt like your garden plants were plotting against you—they refuse to bloom, wilt at the slightest hint of sunshine, or look generally miserable—maybe it’s time to dig deeper – literally. Before you plant your first seed this spring, let’s talk about soil testing, the gardening equivalent of a health check-up for your dirt.
What Is Soil Testing?
Soil testing reveals the pH level, nutrient content, and health of your ground. This essential process eliminates guesswork about your soil’s condition and allows you to make informed decisions on how to improve it. Instead of randomly overusing fertilizers or guessing what amendments your garden needs, you can give your soil exactly what it requires.
Soil testing provides several benefits:
- Identifies whether your soil is too acidic or alkaline.
- Pinpoints nutrient deficiencies like low nitrogen or phosphorus.
- Helps tailor soil amendments to specific plant needs.
- Prevents over-fertilizing, which can harm plants and the environment.
Understanding your soil’s unique makeup greatly increases your chances of gardening success.
Why You Should Test Your Soil
Healthy soil is the foundation for every successful garden. Testing helps you identify problems before they affect your plants. Without it, even experienced gardeners may struggle.
Here are some of the key benefits:
Save Time and Money
Avoid spending money on unnecessary fertilizers or amendments. Testing ensures you invest in things that your soil actually needs.
Improve Plant Health
Plants grow best in soil with the right pH and nutrient balance. Testing helps create these optimal conditions.
Protect the Environment
Over-fertilizing leads to harmful nutrient runoff, which can damage nearby ecosystems. Soil testing helps you avoid this problem.
Boost Yields
Whether you grow vegetables, flowers, or herbs, healthier soil leads to stronger plants and larger harvests.
By testing your soil, you get to garden smarter and see better results in return.
How to Test Your Soil
Testing your soil might seem complicated, but it’s easy with the right steps:
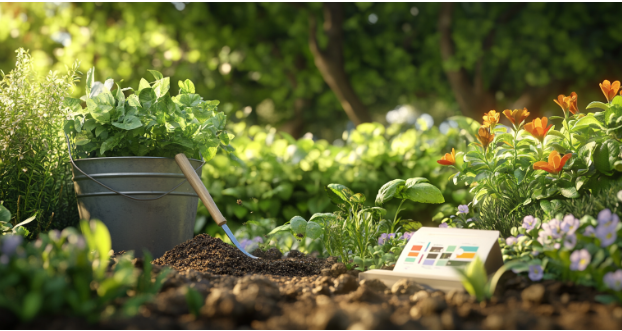
1. Collect Soil Samples
Gather soil from multiple areas in your garden. Use a clean trowel to dig 4–6 inches deep, where most plant roots grow. Mix the samples together in a bucket to create a composite sample.
Tip: Avoid collecting soil near compost piles, heavily trafficked areas, or recently fertilized spots. These can lead to inaccurate results.
2. Choose Your Testing Method
- DIY Soil Test Kits: These kits are affordable and measure basic metrics like pH and primary nutrients (nitrogen, phosphorus, and potassium).
- Professional Labs: For a detailed analysis, send your soil to a lab. Many local cooperative extension offices provide this service at a low cost.
3. Follow the Instructions
For DIY kits, carefully follow the directions. Typically, you’ll mix soil with water or a chemical solution and compare the results to a chart. If you’re using a lab, package your sample as instructed and mail it.
4. Analyze the Results
After testing, focus on the following:
- pH Levels: Most plants prefer slightly acidic to neutral soil (pH 6.0–7.0). For example, blueberries thrive in acidic soil, while lavender prefers alkaline conditions.
- Nutrient Levels: Labs often provide recommendations to address deficiencies, such as adding nitrogen for leafy growth or phosphorus for blooming.
By understanding these results, you can amend your soil effectively.
Fixing Common Soil Problems
If your soil has issues, don’t worry—most problems are fixable. Here’s how to address some common challenges:
Acidic Soil
To raise the pH, apply agricultural lime. Wood ash can also help but apply sparingly to avoid overcorrection.
Alkaline Soil
Lowering the pH requires sulfur or composted organic material like pine needles. These amendments work gradually and effectively.
Nutrient Deficiencies
- Low Nitrogen: Add blood meal, alfalfa meal, or a high-nitrogen fertilizer.
- Low Phosphorus: Use bone meal or rock phosphate.
- Low Potassium: Incorporate potash or organic wood ash.
Compacted Soil
Compacted soil restricts drainage and root growth. Aerate the area and mix in organic matter like compost to improve soil structure.
When Should You Test Your Soil?
The best times to test soil are early spring and late fall. These seasons allow time for amendments to take effect before normal planting time or prior to winter. Avoid testing frozen or waterlogged soil, as they can yield inaccurate results.
The Environmental Benefits of Soil Testing
Soil testing helps your garden while also protecting the environment. Over-fertilization often causes nutrient runoff, which harms streams, lakes, and aquatic ecosystems. By testing your soil, you ensure sustainable gardening practices that limit chemical use.
For more on sustainable soil management, visit the Environmental Protection Agency or the USDA’s Soil Health Resources.
Soil Testing Sets the Stage for Garden Success
Soil testing is your garden’s secret weapon. It saves time, reduces costs, and ensures your plants thrive. By understanding your soil’s pH and nutrient levels, you’ll make informed decisions and grow healthier, more productive plants.
Don’t leave your garden’s success to chance. Test your soil before planting, make the necessary amendments, and watch your garden flourish this season.
Join the Conversation
Have you tested your soil yet? Share your experiences or questions in the comments below! Let’s make this gardening season the most rewarding one yet.
FAQs
1. Why is soil testing important?
Soil testing identifies your soil’s pH, nutrient levels, and health. It ensures plants get the right nutrients, saves money, and protects the environment.
2. How often should I test my soil?
Test soil every 2–3 years. However, test immediately if starting a new garden or if plants are struggling.
3. Can I test soil myself, or should I use a lab?
Both work. DIY kits measure basics like pH, while labs provide detailed results, including micronutrients and organic matter.
4. What is the ideal pH range for plants?
Most plants thrive in slightly acidic to neutral soil (pH 6.0–7.0). Some plants, like blueberries, prefer more acidic soil.
5. What if my soil test reveals deficiencies?
Apply amendments based on results. For nitrogen, use blood meal. For phosphorus, use bone meal. For potassium, apply potash.
6. How do I collect a soil sample?
Use a clean trowel to dig 4–6 inches deep. Take samples from multiple spots, mix them, and follow testing instructions.
7. When is the best time to test soil?
Test in early spring or late fall for the most accurate results and ample time to amend.
8. How long do lab test results take?
Lab results typically take 1–2 weeks. Local extension offices may offer quicker turnaround.
9. What’s the difference between acidic and alkaline soil?
Acidic soil has a pH below 7 and suits plants like blueberries. Alkaline soil has a pH above 7, ideal for lavender.
10. Can soil testing improve sustainability?
Yes! Soil testing reduces over-fertilization, minimizing runoff and protecting ecosystems. It promotes eco-friendly gardening practices.
