

Summer offers an abundance of vibrant herbs, filling the air with their delightful aromas and flavors. Preserving herbs can be exciting and rewarding whether it’s basil, rosemary, or thyme. Imagine capturing the essence of summer to enhance your dishes throughout the colder months.
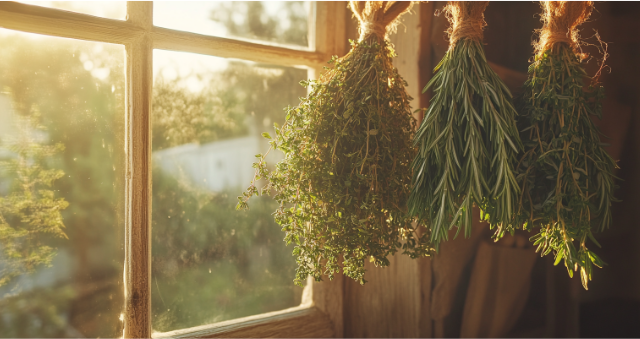
A close-up of drying herbs hanging in a rustic kitchen, bundles of rosemary, thyme, and sage gently swaying, sunlight filtering through an old wooden window.
5 Proven Ways to Preserve Herbs
When it comes to preserving the fresh flavors of herbs, there are several tried-and-tested methods that not only ensure longevity but also help retain their aromatic properties. Delicate herbs like basil or hardy herbs like rosemary require specific techniques to preserve their unique taste and fragrance. Proper preservation allows you to enjoy the vibrant essence of your garden throughout the year, even after the growing season has ended.
The following five methods are reliable, easy to execute, and have been utilized by home cooks and chefs for generations. Whether you’re interested in drying, freezing, creating herb-infused products, or using classic preservation methods like salt curing, these methods will help you maintain the natural oils and flavors that make herbs desirable in cooking.
1. Drying Herbs
Drying herbs is one of the oldest and most reliable techniques for preservation. It works because it removes the moisture content, which helps prevent mold and decay, while still retaining the herb’s essential oils that give it its flavor. Additionally, this technique works particularly well for hardy herbs like rosemary, thyme, oregano, and sage, which naturally contain lower moisture levels, making them easier to dry.
By following these careful steps, you can ensure your herbs retain their peak potency and flavor, ready to be used in your cooking throughout the year.
Harvesting
First, pick herbs in the morning, after the dew has evaporated. This ensures the highest concentration of essential oils, which are most abundant now. Harvesting during this window helps maximize the flavor and aroma of the herbs, making them more potent when dried. It’s best to choose healthy, undamaged leaves for the best results.
Cleaning
Gently rinse the herbs with cool water and pat them dry with a towel to remove dirt and insects while maintaining their delicate leaves. Avoid soaking the herbs, as excess moisture can prolong the drying process and increase the risk of mold. Make sure the herbs are completely dry before proceeding to the next step.
Bundling
Gather small bunches and tie their stems with a string or rubber band. Smaller bunches dry more evenly, reducing the risk of mold. Bundling them too tightly can trap moisture inside the leaves, so leave enough space for air to circulate between the stems.
Hanging
Hang the bundles upside down in a well-ventilated, dry, dark space such as a pantry or closet. Darkness helps preserve color and potency, while proper ventilation ensures the herbs dry thoroughly. A dry, airy environment prevents mold growth and helps the herbs retain their natural oils for better flavor retention.
Storing
Finally, once the herbs are completely dry, crumble the leaves off the stems and store them in airtight containers. This prevents exposure to air and moisture, which can cause the herbs to lose their flavor. Store the containers in a cool, dark place to further protect the herbs from light and humidity, which could degrade their quality over time.You can read more about drying techniques on The Old Farmer’s Almanac.
2. Freezing Herbs
Freezing herbs is a proven way to preserve their bright flavors and colors. Unlike drying, freezing locks in moisture, which helps herbs like basil, cilantro, and dill retain their fresh taste. Moreover, the freezing process halts enzymatic activity that causes wilting, keeping the herbs flavorful for months.
Freezing herbs is quick and versatile, offering various options depending on how you plan to use them later. So, try these methods of freezing herbs.
Whole Leaf Freezing
Lay herb leaves on a baking sheet and freeze. This prevents the leaves from sticking together and helps them freeze individually. Once frozen, transfer them to a freezer-safe bag, removing as much air as possible to avoid freezer burn. This method is quick and convenient, as it allows you to grab individual leaves as needed, making them easier to use later in dishes like salads or garnishes.
Herb Ice Cubes
Alternatively, chop herbs finely, place them in an ice cube tray, and fill each compartment with water or olive oil. Freezing in this way locks in flavor and creates pre-portioned amounts of herbs for soups, stews, and sauces. The oil or water helps protect the herbs’ delicate texture while freezing, maintaining their vibrant taste when thawed. This method is ideal for adding bursts of flavor to hot dishes or preserving herbs that are difficult to freeze, like parsley or cilantro. This method is covered extensively on The Spruce Eats.
3. Making Herb Butters
Herb-infused butter is a great way to capture the fresh flavors of herbs and use them in your cooking for months. The butter acts as a fat base, preserving the herbs while creating a rich, flavorful spread that enhances everything from vegetables to meats. It’s simple to prepare and store, making it a convenient option.
Making herb butter is a simple yet flavorful way to preserve the essence of fresh herbs. Following these steps, you can create a versatile spread that enhances various dishes, from roasted vegetables to grilled meats. This easy-to-store butter adds convenience and a burst of flavor to your kitchen year-round.
Softening Butter
Allow the butter to soften at room temperature. Soft butter mixes better with herbs, ensuring an even distribution of flavors. It’s important not to melt the butter, as this can affect its texture and how well it incorporates the herbs. Softened butter provides the right consistency for a smooth, even blend.
Mixing
Next, chop herbs finely and mix them into the butter. Add salt or pepper to taste. This step helps infuse the butter with the fresh flavor of herbs, making it a versatile cooking ingredient. You can also add garlic, lemon zest, or other seasonings to customize the flavor further. Mix thoroughly so the herbs are evenly spread throughout the butter.
Shaping
Roll the butter into a log using parchment paper, twisting the ends to seal it. This makes it easy to store and slice off portions as needed. The log shape is convenient because it allows you to cut exactly the amount you need for cooking, melting, or spreading. If preferred, you can also mold the butter into other shapes, like disks or cubes.
Storing
Finally, refrigerate or freeze herb butter for long-term use. Butter naturally protects herbs from freezer burn, so you can enjoy them long after harvest. If freezing, wrap the butter tightly in plastic wrap or store it in an airtight container to prevent it from absorbing other freezer odors. Properly stored herb butter can last several months.
4. Creating Herb Vinegars
Herb vinegar is a way to add a gourmet touch to your meals. Vinegar is a natural preservative, and when herbs are steeped in it, they infuse their flavor into the liquid, creating a product that can elevate salads, marinades, and dressings. This method is ideal because it preserves the herbs and enhances the vinegar itself.
Creating herb-infused vinegar is a simple yet effective way to capture the vibrant flavors of your herbs. The process enhances both the vinegar and the herbs, transforming them into versatile kitchen ingredients. Follow these steps to craft herb vinegar that can elevate everyday dishes with a burst of freshness.
Choosing Vinegar
First, select high-quality white wine vinegar, apple cider vinegar, or rice vinegar. The quality of the vinegar determines the final taste of your herb-infused product. A good vinegar base will ensure that the flavors from the herbs are properly absorbed, resulting in a smooth, well-balanced vinegar. Choosing a type of vinegar that complements your herbs is important, as different vinegars have distinct flavors.
Preparing Herbs
Rinse and slightly bruise the herbs to release their essential oils. Bruising the herbs helps the vinegar absorb their flavors more quickly and intensely. Gently crush the herbs using your fingers or the back of a spoon, being careful not to overdo it. This allows the herbs’ essential oils to infuse into the vinegar more effectively, providing a rich and aromatic flavor.
Infusing
Place herbs in a sterilized jar and cover them with vinegar. Let them steep for a few weeks. Over time, the vinegar draws out the herbs’ flavors, making it more fragrant and flavorful. Store the jar in a cool, dark place to allow the infusion to happen gradually. Shake the jar occasionally to encourage better flavor distribution throughout the vinegar.
Straining
Finally, once the vinegar has reached the desired flavor, strain out the herbs and bottle the vinegar. Straining ensures the vinegar stays clear and free of plant particles. Use a fine mesh sieve or cheesecloth to ensure no herb remnants remain in the final product. This step guarantees a smooth, polished vinegar, perfect for dressings or marinades.
5. Using Salt for Preservation
Salt preservation is a classic method, particularly for moisture-rich herbs like basil, cilantro, and chives. Salt works by drawing moisture out of the herbs, which prevents spoilage while also creating flavorful, herb-infused salt that can be used in cooking. This method is simple and has been used for centuries to extend the shelf life of herbs.
Preserving herbs with salt is practical and provides a unique flavor enhancement for your dishes. The process creates herb-infused salt, which can be used as a seasoning, while also allowing the herbs to be stored for long periods. Follow these steps to ensure your herbs are well-preserved and ready to use whenever needed.
Layering
In a jar, alternate layers of coarse salt and herbs. The salt acts as a natural preservative, preventing bacteria from growing by drawing out the moisture from the herbs. It’s important to use coarse salt, as finer salt may dissolve too quickly. By layering, the herbs are surrounded by salt, ensuring even preservation throughout the jar.
Sealing
Pack the layers tightly to minimize air exposure. Less air means less chance for spoilage or mold. By compressing the layers, you’re ensuring that the herbs are fully covered by the salt, which maximizes the preservation effect. This step helps create an airtight seal within the jar, further protecting the herbs.
Storing
Store the jar in a cool, dark place. The salt will continue to draw moisture from the herbs, preserving their flavor and color. To maintain the potency of the herbs, keep the jar away from direct sunlight and heat. Over time, the salt will become infused with the herbs’ essence, making it a flavorful addition to your cooking.
Using
When ready to use, brush off the salt before adding the herbs to your dishes. The infused salt itself can also add an extra burst of flavor to your cooking. Not only can the preserved herbs be used in various recipes, but the salt, now rich with herbal flavors, can be sprinkled onto meats, vegetables, or even used as a finishing touch on salads.
Preserving Herbs for Year-Round Freshness
By mastering these methods, you can easily enjoy the flavors of your herbs long after summer ends. Whether you prefer drying, freezing, or creating herb-infused products, each technique helps maintain the vibrant essence of your garden. Don’t wait until frost arrives—start preserving herbs today and savor their bright flavors in every season.
