

Learning how to grow sprouts indoor is a basic skill every gardener, new and pro, should master. These little powerhouses are packed with many nutrients, yet you can grow them at almost zero cost and in the most convenient way.
This guide will breakdown for you how to grow sprouts:
RELATED: How To Build Your Own Hydroponic Tower Garden
How to Grow Sprouts in Your Kitchen Two Ways
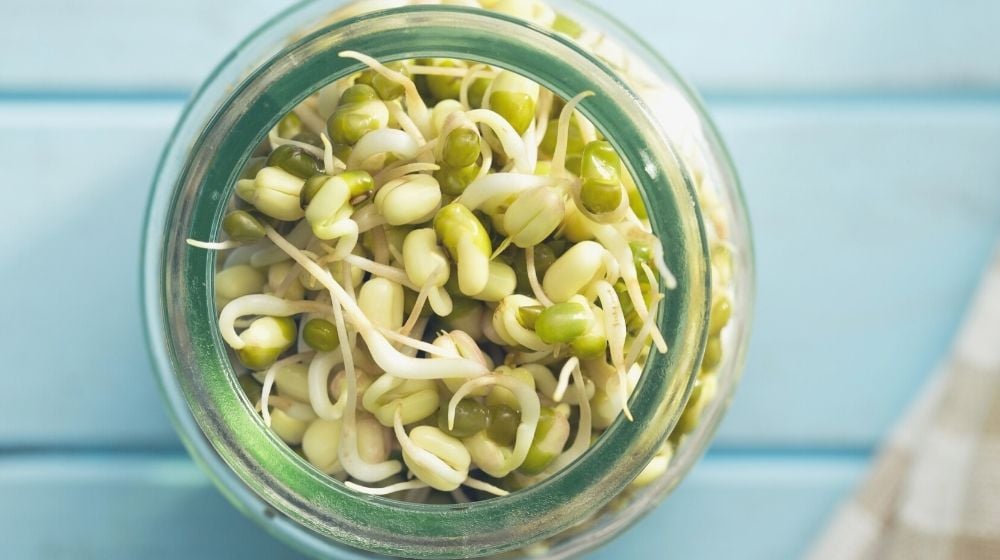
How to Grow Sprouts in Jars
Things You’ll Need
- Sprouting seeds
- Mason jars with lids
- Cheesecloth
- Mason Jars canning rings or rubber bands
- A sieve
- Draining tray or bowl
- Towels
Step 1. Soak the Sprouting Seeds
|
Put your sprouting seeds in your mason jars starting with a small quantity until you get good at it.
For the next 12 hours, store the mason jars in a dark area, preferably a cabinet.
Tip: Mix your sprouting seeds varieties before soaking them. You can have a jar with a protein mix and another with a nutty blend.
Step 2. Set up the Sprouting System
|
At the end of 12 hours, drain your sprouting seeds. A sieve will help to catch the seeds, so they don’t waste away.
Return the sprouting seeds into the mason jars, and this time, leave out the lids. Instead, cover the top of the sprouting jars with cheesecloth and use rubber bands to secure them if you do not have canning rings.
Prop your sprouting jars and have something to hold them so the residual water can continue draining. Cover your propped sprouting jars with towels and keep them away from direct sunlight.
Tip
- Covering the mason jars with towels protects the sprouts from airborne contamination.
- Ideally, prop your sprouting jars away from sunlight in a place where they can drain. Otherwise, you will need a draining bowl or tray to hold the draining water.
Step 3. Rinse the Sprouts
|
This is the make or break stage. Rinse your seeds several times each day with cold freshwater. Do this for three to four days or until your seeds begin to sprout.
With each rinse, use the sieve to catch the seeds, and don’t forget to secure the cheesecloth with rubber bands or rings. Change the cheesecloth when they begin to hold dirt.
Remember: The idea is to keep the sprouting seeds moist but not wet.
Step 4. Harvest the Sprouts
@hiang5Nhà làm giá, nên giờ đổ vỏ :))) ##giáđỗ ##vietnam ##vietnamese ##vegetable ##love ##beansprout ##tiktok ##video♬ オリジナル楽曲 – あああつし
When the seeds sprout, remove them from the mason jars, and place them in clean, dry jars. Set them in indirect sunlight for 12 to 24 hours.
If you don’t have other mason jars, clean the ones you were sprouting in, dry them, and add the sprouts.
Air dry any sprouts you don’t eat right away on a linen towel and then store them for at least five days in your refrigerator.
Tip: Placing the sprouts in indirect sunlight for 12 to 24 hours allows them to produce carotene and chlorophyll, which serve as nutrients to our bodies.
RELATED: How To Build A Wick System For Your Hydroponic Garden
How to Grow Sprouts in DIY Sprout Trays
Things You’ll Need
- Sprouting seeds
- Ice pick
- Two one-gallon BPA free plastic containers
- Heat source
- Safety gloves
- Colander
- Knife
Step 1. Make the DIY Sprouting Tray
Using a hot ice pick, make holes on the base of an upside one-gallon plastic container. Making the hole from the outer base keeps the inside smooth for the sprouts.
Depending on how many containers you are going to stack up, cut around the container lids roughly one inch from the edge of the lids.
Be sure to trim off the rough edges on the base with a knife. It should be simple when the plastic is still warm.
Step 2. Soak the Sprouting Seeds
Wash and place your sprouting seeds in a bowl. Cover the seeds entirely with water and soak them overnight.
Step 3. Set up the Sprouting System
Thoroughly wash and sanitize your DIY sprouting trays with vinegar.
Transfer the seeds to the sprouting tray and rinse them. The drainage holes will drain the water quickly and efficiently.
You will need two or more containers to avoid overcrowding your tray. Once you are done with the rinsing, stack your sprouting system.
Remember: The first tray should not have its lid cut, but the other should. The bottom-most container should be an empty container to collect the residue water.
Step 4. Rinse the Sprouts
Rinse your seeds as many times as you can each day with cold freshwater. But one in the morning and one at night will suffice. Do this for three to six days or until your seeds sprout.
Remember: Shake the tray to evenly disperse the sprouts and drain as much water as possible.
Step 5. Harvest the Sprouts
After around six days, your sprouts will be ready for harvest. Take off the lid and rinse as you harvest your sprouts. A colander will help you drain the water off your sprouts.
Tip: Air dry any sprouts you don’t eat right away and then store them for a maximum of five days in your refrigerator.
Step 6. Clean the Sprout Tray
Clean the trays and lids thoroughly with hot soapy water and a brush.
Air dry your sprout trays and store them in a clean place until next use.
Tip: Always clean your sprout trays before use.
Recycle those empty Coca-Cola plastic bottles and learn to grow sprouts with Dahlia:
There you go, green thumbs! You now know how to grow sprouts at home. You get to add more healthy homegrown eats to your diet at an amazingly low cost!
Happy sprouting!
What sprouts will you be growing first? Let us know by leaving a comment below!
Up Next:
- 13 Best Plants For Hydroponics
- How To Germinate Seeds | A Gardener’s Guide To Sprouting Seeds
- 27 Perfect Summer Garden Crops For A Bountiful Harvest
Calling all green thumbs, Garden Season needs YOU!
Click here if you want to write for us!
Want to stay up to date? Follow Garden Season on Facebook, Twitter, Instagram, and Pinterest.
