

Fall garden prep is essential for every gardener who wants a vibrant, thriving garden next spring. While it’s tempting to think of spring as the main gardening season, fall is the perfect time to lay the foundation for rich, healthy soil. By preparing your garden beds in autumn, you’re giving your plants the best start possible.
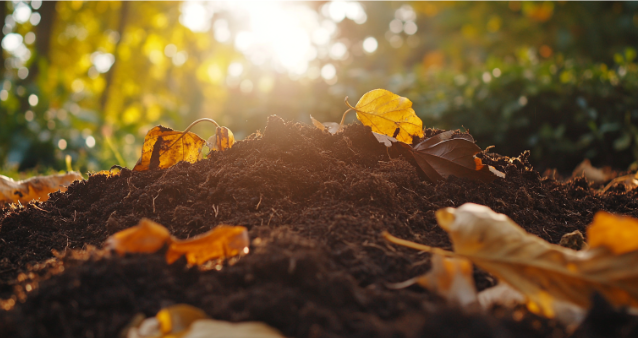
A close-up of a fall garden bed, rich soil exposed and aerated with a garden fork, hints of compost and organic matter layered over the soil, autumn leaves scattered nearby, a soft golden sunlight filters through – hd quality, natural detail, cinematic lighting, serene garden atmosphere, bokeh background effect, warm color grading, shallow depth of field
Why Fall? The Garden Prep Mindset
Fall is the ideal time for garden prep because it lets nature work her magic all winter. The freezing, thawing, and microbial activity naturally during the cold months improve soil structure and nutrient content, making it richer and easier to work with come planting time. By handling garden prep tasks in fall, you’re setting yourself up for success and freeing up more time for spring planting—a true gift for any gardener!
How to Set Up Your Garden for Success with Fall Prep
As the growing season winds down, it’s easy to let the garden rest until spring. But for the savvy gardener, fall is the real secret to a thriving garden next year! With a few well-timed steps, you can enrich your soil, boost nutrient levels, and keep beneficial organisms active through winter—all setting the stage for healthier, happier plants in spring.
Ready to get a head start? Here’s a quick guide to fall garden prep essentials, including how to handle soil care, organic amendments, and winter protection for your garden beds without the heavy lifting of tilling. Your future garden will thank you!
Step 1: Rethink Tilling
Rather than turning the soil over and disrupt vital ecosystems and beneficial organisms, aim for a no-till approach. Use a garden fork to gently aerate the soil, allowing air and nutrients to penetrate without disturbing those essential microorganisms too much. A light, careful turning or poking will do the job.
Step 2: Mindfully Clear Out Spent Plants
After harvest, those tired tomato vines, cucumber plants, and wilting squash leaves need attention. Start by removing diseased plants to prevent any pests from overwintering in the soil, then compost the healthy plant material. Let the roots of beans and peas stay put—these legumes store nitrogen in the soil and enrich it as they naturally break down.
Leaving some spent plants to decompose in place also provides winter shelter for beneficial insects and gradually adds organic matter to replenish nutrients.
Step 3: Test Your Soil
Now is the perfect time to test your soil. A simple at-home test kit or a local Cooperative Extension Service can provide insight into your soil’s pH, nutrient levels, and organic matter content. Fall soil testing lets you address any deficiencies long before planting season arrives. Common nutrients like phosphorus and potassium take time to incorporate, so adding them now means they’ll be ready when you need them.
Don’t forget to check your soil’s pH. Most vegetables thrive in slightly acidic to neutral soil (6.0–7.0 pH). If adjustments are needed, such as adding lime, fall is the best time since it has months to integrate fully.
Step 4: Add Organic Matter and Amendments
With a soil test in hand, you’re ready to add organic matter. Compost, well-rotted manure, or shredded leaves work wonders as a base layer. Spread a generous amount over your garden bed and aim for a two- to four-inch thickness. If your soil test reveals specific nutrient needs, like phosphorus or potassium, this is the time to add targeted amendments like bone meal or green sand.
This organic matter provides insulation, guards against erosion, and feeds the microbes that improve soil structure. As winter weather helps break it down, your soil will grow more fertile and hold moisture better until spring arrives.
Step 5: Plant a Cover Crop
Cover crops, or “green manure,” make a fantastic addition to your fall prep. Plant options like clover, rye, and hairy vetch to protect the soil and prevent its erosion. These plants also enrich the ground with nutrients. Additionally, the roots aerate the soil, and when cut down in early spring, they become a built-in mulch and nutrient source.
Cover crops shine in bare spots you want untouched until later in the season. They also help revive compacted or nutrient-poor soil and rehabilitate your garden bed over winter.
Step 6: Mulch, Mulch, Mulch
Mulch is the finishing touch in fall garden prep. A layer of straw, leaves, or shredded bark adds insulation, keeps soil moist, and creates a stable environment for beneficial organisms. Mulch also prevents pesky winter weeds from sprouting.
If the mulch decomposes over winter, that’s a good thing—it’s feeding your soil. Add more in spring if needed to keep those nutrients flowing.
Step 7: Encourage Worm Activity
Worms are natural soil aerators and nutrient producers, making them essential to fall garden prep. They keep soil loose, nutrient-rich, and full of beneficial castings. To attract worms, add organic matter directly to your garden or place a small compost bin in the garden bed. Worms will stay active all winter, keeping your soil in prime condition for spring.
Fall Garden Prep Pays Off in Spring
Wrapping up your fall garden prep is the best investment for spring. Healthy soil, abundant growth, and a bountiful harvest will greet you with far less work once spring planting season begins. So grab that garden fork, spread some mulch, and let the fall-to-spring soil magic unfold. Your future garden will thank you!
P.S. We’d love to hear how your fall garden prep is going! Share your tips or show us your progress for setting up a spectacular spring garden—we’re excited to see what you’re working on!
