

Hydroponic tower gardens are becoming popular, especially among urban gardeners due to the system's efficiency and small gardening spaces. The system will cost you 500-1,000 dollars, but Garden Season is here to show you how you can make your hydroponic tower garden for way less.
RELATED: 13 Best Plants For Hydroponics
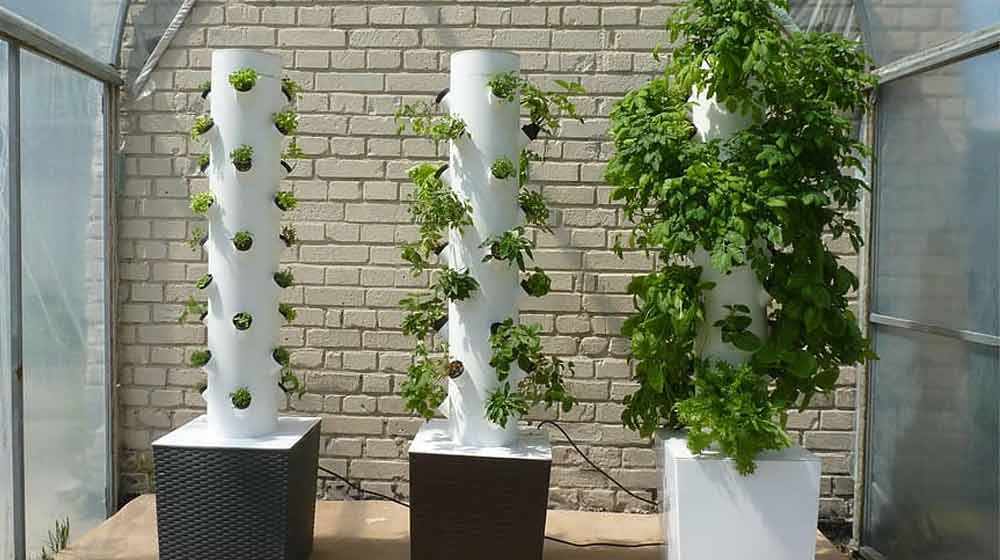
How to Build a Hydroponic Tower Garden Like a Pro
Materials You'll Need
- 5-gallon food-grade bucket
- 7 ft. long 4-inch PVC pipe
- 10 ft. long 1 1/2-inch PVC
- PVC solvent cement
- 1 pc. 4-inch PVC collar
- 1 pc. 4-inch PVC bracket
- 1 pc. 5-inch PVC square
- 6 ft. long 1/2-inch poly tubing
- 1 pc. 1/2-inch barbed tee
- aquarium-safe silicon
- 2 pcs. 1 1/2-inch bolts with nuts
- a submersible pump (can pump up to 6 feet)
- 20 pcs. 2-inch net cups
- seedlings
- nutrient solution
- hydroton
- two bucket lids


Tools and Equipment Required
- drill with 3-inch bits
- miter box or saw
- jigsaw
- ruler
- tape measure
- sandpaper
How to Build a Hydroponic Tower
Step 1. Work on the Tower Pillar
- Cut two lengths of the 4-inch PVC pipe, one at 6 feet and the other at 4 inches.
- Using your ruler, draw four equally spaced lines around your 6 ft. 4-inch PVC pipe. Once you draw your first line, use your tape to measure the remaining three lines at 3 1/2 inches apart.
- Use your tape measure to mark where you will drill the holes for your net cups. On the first line, mark the holes 5 inches from the top of the pipe and the rest at 15 inches, 25 inches, 35 inches and, 45 inches marks.
- On the second line, mark the first net cup hole at 10 inches from the top of the pipe and the rest at 20 inches, 30 inches, 40 inches, and 50 inches.
- The net cup holes on the third line should correspond to those on the first line, and those on the fourth line with the ones on the second line.
Step 2. Work On The Net Cup Holders
- Use 1 1/2-inch PVC pipe to cut 20 net cup holders.
- Cut the cup holder at a 45-degree angle on one end, either a 12-degree angle or straight cut on the other end, and a 1 1/2 cm space in between. Make 20 pcs. of these holders.
- Draw a center mark outside the 45-degree cut side of one net cup holder, and center the cup holder on the hole marks on your 4-inch PVC pipe.
- Align the marks and trace the cup holder's outline on the 4-inch PVC pipe. Repeat this for the remaining net cup holder hole marks. The 45-degree cut points towards the bottom of the pipe.
- To cut out the holes, first drill out holes big enough to accommodate a jigsaw blade then cut along the outline for all the 20 hole marks.
- Lightly sand to smooth out the edges of the holes.
Step 3. Glue the Cup Holders to the Tower Pillar
- Generously apply PVC solvent to the inner rim of the holes on the 4-inch pipe and the outside of the cup holders.
- Insert the holders into the 4-inch holes and adjust to ensure they fit snugly, leaving no gaps. Use a piece of wood to push the cup holders, so they stick to the 4-inch pipe.
- Apply more PVC solvent on the outside and let the wood sit for a few minutes then pull it out.
- Once all the holders are glued, apply your aquarium-safe silicone to seal everything in and let it dry for at least 24 hours.
Reminder: The cup holders should fit perfectly into the holes on the bigger pipe. If the hole is too small, the cup holder will pop out. It will fail to glue together if the hole is too large.
RELATED: 7 Must-Know Tips When Growing Lettuce In Summer
Step 4. Work on the Reservoir
- Trace the inside of your 4-inch PVC collar onto the 5-inch PVC square. Next, outline the 1/2-inch tubing at the center of the PVC square.
- Cut out the circle from the PVC square and drill a 1/2-inch hole for the tubing to fit snugly.
- Randomly drill around 20 1/8-inch holes on the cover and lightly sand afterward.
- Drill two holes on your 5-gallon bucket and secure your PVC bracket with two sets of bolts and nuts. Leave some allowance at the top so the bucket can close.
- With the 4-inch PVC pipe in the bucket secured by the bracket, measure the distance between it and the bucket's inner rim.
- Place the 4-inch pipe on one lid; trace the outline and cut out the 4-inch circle using your jigsaw.
- Cut the edges of the second lid off so it fits snugly inside the bucket. Retrace the 4-inch pipe outline. Remove the lid.
- Using a jigsaw, cut out the 4-inch circle. This will help keep the pipe securely in place when inside the bucket to prevent tipping.
Step 5: Assemble Your Hydroponic Tower
- Glue your 4-inch PVC collar onto the top of the 4-inch PVC pipe.
- With the 4-inch PVC in the bucket, place your pump into the reservoir and mark where the tubing will exit. Cut out the hole and drill several other holes at the bottom of the 4-inch PVC.
- Put your poly tubing through the 1/2 inch hole on your PVC cover and insert the 1/2-inch barbed tee into the horse tubing.
- Insert the PVC cover into the 4-inch collar.
- Cut a nudge on the bucket rim for the electrical cord and the air horse tubing.
- Place your tower through the first lid, the bracket, and onto the second lid at the bottom of the bucket. Next, connect the tubing to your pump.
- Do a test run to check for leaks. If you need to reapply the silicone, let it dry for another 24 hours.
- Leave running overnight to ensure everything is perfect.
Step 6. Set up Your Plants
[instagram url=https://www.instagram.com/p/BfjJJKsHhQO/ hidecaption=true width=800]
-
- Add your nutrients solution to the water already in the bucket.
- Place your seedlings in the 2-inch net cups and add hydroton to block out the light and keep the seedlings in place.
Make a single cut on the net cups to sit firmly in the pipe with their outer rim sting on the holder's rim.
Tip: To keep algae away and maintain a cool temperature, place an insulation foil on the rim and around the bucket.
Why Build a Hydroponic Tower
@dezz512 ♬ original sound – dezz512
Hydroponics is a modern technique where plants are grown without soil either vertically or horizontally. As the name suggests, nutrients to the plants are provided through the water in a gravity-fed system from the top and collected in a reservoir at the bottom.
There are several reasons why you should build a hydroponic tower.
- Zero soil-related pests and diseases
- Enables a high yield in a small space
- Excellent for urban gardening
- Guarantees produce
- Water-efficient
With all these advantages, you can never go wrong with hydroponic tower gardening.
Watch this video from Over 60 Crafter on how to make a hydroponic tower system:
[youtube https://www.youtube.com/watch?v=tUYs0pI1a3o&w=800&h=450]
There you have it, fellow green thumbs, a hydroponic tower garden that is cost-efficient and effective for your small space gardening needs.
Have fun building as many hydroponic towers you need.
Apart from lettuce, what other plants are you planning on growing in your hydroponic tower? Let us know by leaving a comment below!
Up Next:
- Hydroponic Gardening FAQs: What Is It And How Does It Work?
- Growing Lettuce Indoors In 3 Ways For A Fresh Winter Harvest
- How To Grow Roses From Cuttings
Calling all green thumbs, Garden Season needs YOU!
Click here if you want to contribute for us!
Want to stay up to date? Follow Garden Season on Facebook, Twitter, Instagram, and Pinterest.


6 thoughts on “How To Build Your Own Hydroponic Tower Garden”
You used 1 1/2 inch pipe to hold plants but you used 2 inch net pots. How can 2 inch pots fit in 1.5 inch holes? I am confused.
I believe the net pots are tapered, narrower at bottom and the wider top prevents them from falling through
How many plants does this design hold?
Really nice instructions…please tell me where i might find information on how long watering cycles should be in a hydroponic rain tower…
Thank you
New to the site. Liked tower build. How much water do you loose thru plant sites?
Can you elaborate on how the plants get the water? Does the tubing simply run up the the inside of the inner 4″ pipe and then run back down it? By my understanding, then the plants would need to have roots long enough to touch the thin film of water running down along the inside of the 4″ tubing. We would also have to hope that the water runs down the insides of the 4″ tubing evenly